How To Fix A Broken Fishing Rod – Ultimate Guide
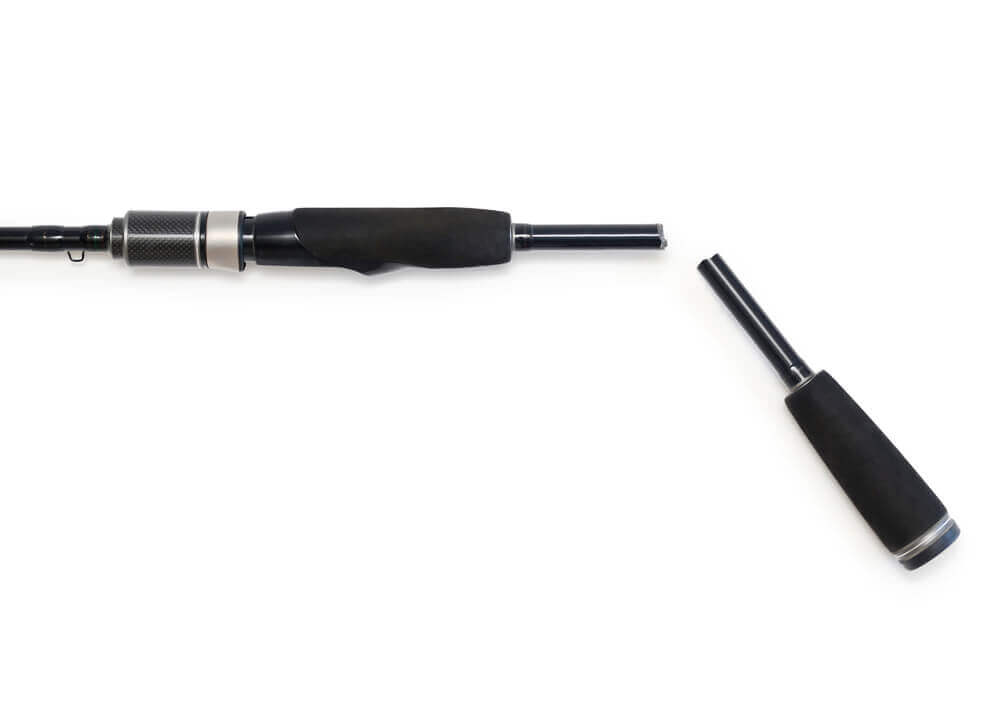
Fishing season is a very thrilling and exciting time for everyone. Every fisher looks passionate and upbeat about this adventurous activity. But, imagine that how this excitement within a second as you see two halves of your fishing rod.
Therefore, in this scenario, it becomes crucial to learn how to fix your fishing rod as it is the only way to avoid frustration and save your money and time. So, even if the rod broke up, you can fix it and go for this exciting activity.
The modern-day rods do not break easily, but there are different, straightforward, and simple ways to fix them if they do. You can fix them with just a few simple tools.
So, stay here for a while to complete your reading and know how to fix a broken fishing rod?
Fixing The Broken Fishing Rod
Here you will learn the ways to fix your broken fishing rod. Just look at this step-by-step guide and fix your fishing rod with simple tools available at home. The whole process will take hardly 45 to 60 minutes, depending on the speed. But remember that you should fix the rod at least four days before you use it.
Materials Required
There are only a very few things that you would require to fix your broken fishing rod:
- Epoxy paste
- Tinfoil
- Sandpaper
- A dowel rod
- Flex coat epoxy kit
- A small bowl
- Rod wrap finisher
- Utility Knife
- A flashlight
- Superline
- Toothpicks
- An old toothbrush
- A soft cloth or tissue paper
- Tin snips
- An old rod
- Two0part coating
- Rod winding thread
Understand The Breakage
As you have collected everything, it is the right time to examine the damage. Take some time and check the damage. You should develop a strategy to fix the damage according to the type of damage. After checking where the breakage is and how severe it is, select your plan.
For example, if the crack is just blank and far away from the guides, the process becomes straightforward. To fix this damage, you do not need to remove any part of the fishing rod. Furthermore, the damage type also helps you determine the methodology. If the damage is clean and smooth, you can manage it very quickly.
But, if the damage is severe or any part of the fishing rod has been crushed or shattered, you would have to get a much longer insert. In addition, you would have to be very careful and must pay attention while working with epoxy.
Selection Of The Method To Fix The Broken Fishing Rod
The fishing rods available in the market are very hard and robust, therefore not easy to break. But, if they get damaged, any one of us can fix them with the help of some simple tools.
To hide the breakage, you can mend it together with the help of a fiberglass pole and epoxy. It is the best way to hide the breakage. And if the guide breaks, you can remove them and wrap a new one in place of them. One can also change the rod tips in case if they are also damaged.
You can fix all the damages within a short time; follow the given step-by-step guide to fix all the damages:
Cut The Broken End Of The Fishing Rod
First of all, you need to cut the broken end of the fishing rod and then make both ends smooth with the help of sandpaper.
Remember that if the fishing rod has smooth ends, then you can quickly fix it together. And if the broken edges are still rough, you can also use the scissor to remove the sharp edges of the rod. The jagged edges become fragile, and they can break up very quickly again.
Determine or Measure The Circumference Of The Rod
To measure the diameter of the rod, always measure the flexible rod. Wrap the tape around the fishing rod, and do not forget to measure the circumference of another piece of the rod to check whether it is skinnier or not.
Get The Piece Of Fiberglass
Here, it would be best if you got fiberglass with a circumference of about 0.32 inches to 0.64 inches. The diameter of the fiberglass should be smaller than the diameter of the fishing rod. Use the hacksaw to cut a small piece of fiberglass. And then, place this piece of fiberglass inside the fishing rod to provide support to the fishing rod without breaking it.
The fiberglass is available at hardware stores just near abut you. The fiberglass color is not a significant issue here as you will fit it inside the rod.
One more thing to notice over here: if your fishing rod is not hollow, there is no need to get the fiberglass pole. Instead of it, you can use the tape to join both parts together once again. The part of an old fishing rod can also be used in place of fiberglass.
Fix The Fiberglass Inside The Fishing Rod
After getting the required fiberglass rod, now is the time to fix it inside the fishing rod. For this purpose, hold the rod in a horizontal position and fix the fiberglass pole. You can use the handle to push one end of the fiberglass inside the fishing rod.
You need to check that the fiberglass rod has been entirely fixed inside the fishing rod or not. And if the fiberglass rod has not been fixed properly, you can either use the masking tape or wrap the pole with the duct.
Apply The Epoxy
Not it’s the time to apply the 2-part epoxy to the exposed end of the fiberglass pole. And once you have applied the epoxy, place the rod inside a bowl. To spread the poxy on the surface of the rod equally and smoothly, you can also use the paintbrush or a useless toothbrush. As soon as you have mixed the epoxy, apply it to the fishing rod as soon as possible. Do not let it set, as it can get dry, and you would not be able to apply it later on. The 2-part epoxy is available at different stores, including the crafts stores and hardware stores.
Side the Second Part Of Rod
You would have to fix the other part of the rod into the exposed end of the fiberglass pole. Here, it would help if you made sure that the guides of the pole are lining up with one another. It is also necessary to confirm that the line will not be tangled up with one another as you try to use the pole again.
Fix both pieces of the rod together, apply the 2-part epoxy on them and leave the fishing rod overnight to dry it. The epoxy can take two to four days to set correctly, so if you feel the need.
In many cases, as one tries to slide the pieces of the fishing gun together, the epoxy comes out. So, if the same thing happens with you can make it smooth with the help of a finger. You can also wrap the electrical tape to make it more secure. The tape will provide additional security to the fishing rod.
How To Replace The Guide On The Fishing Rode?
Follow the given steps to replace the guide on your fishing rode:
Remove The Damaged Guide
You can get a cutting tool, just according to your choice, and then remove the epoxy and bind the old support to the fishing rod. Just give a little twist to it, and it would be removed.
Remove Old Whipping
Here, a little more cutting is again required to remove the whipping. Rub it with a fine wet cloth, dry it for some time and wipe it with acetone once again, and it is ready to be assembled.
Position The New Guide
You can use the cable wires or something else to keep the guide in its place. Once you have made sure that the guide has been placed in the correct position, you can use the glue to fix it for a long time. You can take any thread-like nylon or any other and then wrap the guide on the rod.
Paint the 2-part
So, as the new guide has been placed on the fishing rod and fixed correctly, it is the right time to apply the 2-part epoxy on the thread. After the application of epoxy, leave it for some time to dry completely. As the epoxy gets dry, it will become hard and provide the necessary protection to the guide.
How To Replace The Road Tip On The Fishing Rode?
If the rod tip of the fishing rod has been damaged, you can quickly fix it without any issue. To repair the road trip, follow these steps:
- First of all, eat the tip of the fishing rod tip. In this way, you can loosen the adhesives and leave the rod in a horizontal position. In this way, one can quickly get access to the rod tip. You can pull off the tip of the road is g=heated properly. And if you do not have to heat the road properly, it would take a long time as it is not easy.
- As described earlier, a smooth rod tip can be repaired easily. Therefore, you make the surface smooth with the help of sandpaper. You can also rotate the road trip around the sandpaper to get better results. You can also cut the tip of the rod if the sandpaper fails to make the ends of the rod smooth.
- Rod cement is an adhesive specifically synthesized for the rod tips and guides fixed at their positions. Cut small pieces of rod cement with the help of a scissor.
- Melt the rod cement with the help of a lighter by keeping it inside the rod tip. And one more thing, keep the new rod tip at its potion with the help of pliers. Keep on heating the rod cement for about four to five seconds. As soon as the rod cement melts, do all of your work quickly.
- As the cement is hot, you can rotate the rod tip and lift it at the required position. You can remove the extra cement with the help of a towel and then left the rod for about 1 to 2 hours. During this time, the cement will dry up quickly and use it without any issue.
- Even if the cement gets dried and you feel the need to change the rod tip position, heat the cement and rotate the rod tip to make the required adjustments.
How To Fix The Rod Handle?
If the handle of your fishing rod got damaged, no need to worry; you can fix it very easily and quickly.
If the rod’s handle is cork, rub it with sandpaper until it becomes smooth and make the holes in each section with the help of a drill. And then insert the wooden dowel into the cork. Insert the dowel to the blank side of the handle after coating it with hot glue.
For now, pick a new section, slide it over the dowel, and leave about an eight-inch open area. You can coat the open area with glue and push the two pieces together to create the seal.
Once you have finished the whole process, remove the extra glue and let it dry for few hours.
Final Thoughts
The fishing rods are essential weapons for a fisherman. And a broken fishing rod not only kills the emotions of a passionate fisherman but also breaks their heart. This situation can be more worst and heartbreaking when all this happens in the fishing season.
Therefore, instead of losing hope, you can fix the rod by following these simple and accessible ways. It is economical and a better option rather than purchasing a new fishing rod!
Hopefully, all the ways described here to fix your fishing rod would have helped you. And instead of breaking your heart, you can fight just like a passionate soldier and can enjoy your favorite activity!

