How To Read A Humminbird Fish Finder?
You may have heard of the phrase “Modern problems require modern solutions,” and you must be wondering: how does that apply to fish?
However, you can’t convince an older man living in a cabin near the lake to use modern fishing methods because he has gotten used to natural fishing techniques. At the same time, what if I told you that you could make an exception?
One of the best and innovative technologies available in the market for fishing is a Humminbird fishfinder. This device can help you locate all sorts of fish, anywhere.
Now, let’s come to the part where we try to fade your misconceptions about old and traditional fishing methods. For the most part, it can take you hours to find a fish, and not to mention all the hard work you put into setting up the bait.
Luckily, this human-made invention, the Humminbird fish finder, has made it easier to locate even the rarest types of fish in the sea. So, are you unaware of how to read a Humminbird fish finder screen?
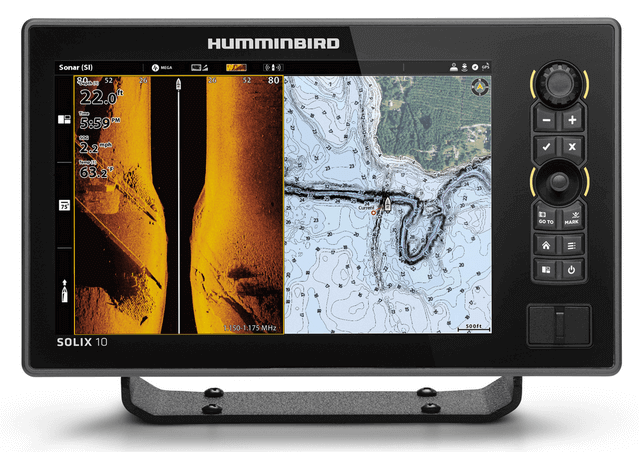
Lucky for you, this device doesn’t demand high-technical knowledge; it is one of the most straightforward and most efficient fish finders in the market.
Furthermore, if you need to learn to use the Humminbird fish finder, then you came to the right place. Here, you will learn everything about the Humminbird fishfinder and how to read precise readings on it. Let’s go.
Understanding The Colorful Display
Fishfinders are perfect for giving you a scanned location of where the fish are under the sea. Besides that, a fish finder can display how a fish will react to your bait, and that can even lead you to a group of fish.
The majority of fish finders feature sonar technology to direct a beam into the water and display its surroundings. However, the sonar technology does not provide accurate coverage, but with some quick hacks, you can efficiently read the screen.
Understanding Side Imaging
The side imaging beam in a Humminbird fish finder releases narrow beams on each side of the boat. These narrow beams are so powerful and versatile that they spread 240 feet from the left to the right side of the ship.
Additionally, you’ll be able to view the water in a 450-ft position. Fishing from the same place will help you catch fish quickly and effortlessly. Moreover, the Humminbird fish finder will highlight all objects under the boat concerning their location.
Furthermore, most Humminbird fishfinders with the Side Imaging feature also include Dual-beam plus sonar. Sonar works well in water with a 1500-ft depth. Besides that, side imagining can only be visible above 200-ft in depth. Therefore, if you want to exceed that depth limit, you’ll have to use the switch fire function.
How To Read Images from the Side Imaging Mode
When it comes to reading images from the side imaging mode, it may take you some time to understand it. On the other hand, if you know the basics of the fish finder, you will quickly get the idea of side imaging.
Your fishing boat is on top of the screen. The center of the screen will be a little dark, and it will provide information about the sonar beams and their travel location in the water.
Furthermore, you will notice many objects, ditches, and fishes in exceptionally on each side of the boat. Other than that, harder lands will be in a less highlighted colour on your screen.
On the contrary, softer parts will appear in a darker shade. Half of the objects underwater reveal sonar shadows. When the objective is broader and lengthier, the reflection seems to be longer.
In the side imaging function, significant fishes appear in a spindle-like shape on the screen. Other than that, you will see a batfish in the form of clouds. Moreover, the sonar reflection displays the location of the fish.
Weeds and Vegetations
You may come across a moment in your fishing life where you will want to fish in areas with plants and vegetation. The fish finder will display vertical lines on the screen whenever you bump into areas with plants and vegetation.
Points
It is easy to identify points because they are slower than drop-offs. If you want a precise reading on the incline, consider stabilizing your reeling speed.
It is essential to scan the image of your surrounding with a narrow beam to get an accurate reading of shelves and humps. Additionally, you cannot precisely pick with a broader beam.
Depressions
When it comes to spotting depressions while carp fishing, make sure to look out for small, v-shaped plunges in the bottom as you reel.
Variety of Underwater Objects
Once you get the hang of sonar technology and understand the screen display, you can effortlessly identify underwater objects that will guide you into marking a fish.
You can also determine the depth of the water with the transducer on the Humminbird fishfinder. With this device, you can predict the type of fish swimming underwater.
Furthermore, you can even determine the temperature of the water with the Depth Finder on this Fish Finder. Hence, you will get an idea of the type of fishing coming your way.
Reading the Humminbird Fish Finder
Congratulations, you have mastered the above four levels of reading a Humminbird fishfinder. Now, let’s move to the part where you properly learn to read the fish finder.
STEP 1:
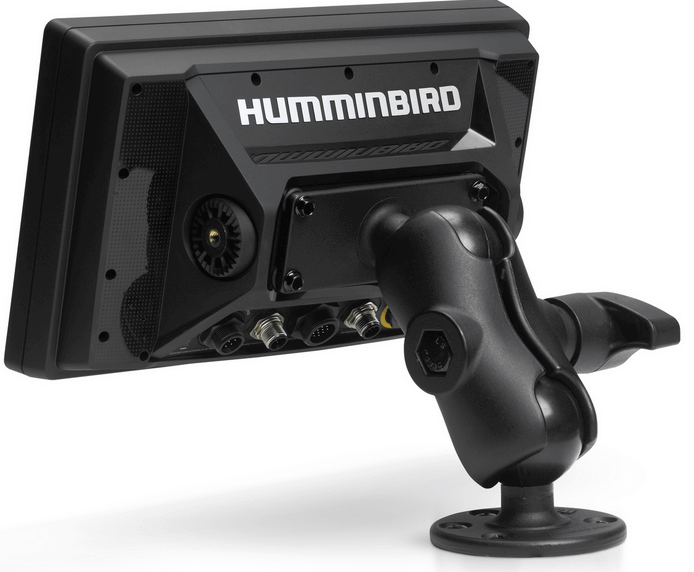
First of all, switch on your Humminbird fishfinder. You will notice a button on one side of the device, press it. The screen will turn on, and you can scroll the screen with an arrow key.
STEP 2:
You can learn a lot about the device by using the manual and stimulator altogether. So, use them both simultaneously.
STEP 3:
The simulator display has a temperature indicator on the top left side of the screen, and below it is a box that displays time on the first line. Other than that, the second line displays the distance travelled while the third line shows the average speed.
STEP 4:
The speed of the ship is on the left center of the display below under the box. It will be easy for you to read the details as everything is in a larger font.
STEP 5:
The bottom right corner displays the calculated depth of the button.
STEP 6:
The estimated data moves from one place to another on the screen while the new data is being recorded.
STEP 7:
If you can manage to give a gander to the lines on the lower side of the display screen, you can understand the button surface. When the button is compact, it will appear as a thin line. When it is on a muddy surface, a thicker line, and when on rocky platforms, it will display broken lines on the screen.
STEP 8:
On the upper side of the screen, transparent surfaces will appear in the form of thin lines. On the other hand, debris on the surface will look like thicker lines, a combination of runs and dots horizontally at the bottom of the surface line.
STEP 9:
The last step is to identify the fish icons on the screen. If you want to determine the location of the object, you can locate the fish according to the colors.
For a fish that is below the boat, an orange color will indicate its presence. The color blue displays a fish present in the outer corner of the sonar.
Furthermore, the depth of the fish will be on top of the fish icon.
So, wasn’t it all straightforward and uncomplicated? With the Humminbird fishfinder, you can become the king of the sea.
Humminbird Fish ID Plus Function
You can find the Humminbird Fish ID Plus Function in every Humminbird fish finder. It can be excellent for a new user to understand and interpret their typical sonar.
The Fish ID plus system offers reasonable criteria for every return of sonar to determine the fish present within the beam. Moreover, the Fish ID Plus function works best with both 83 kHz and 200 kHz sonar, and it even notifies the two sonar returns that are related to the targeted fish.
However, if you need a much better and reliant view, focus, and look on the blended beam instead of the narrow one. Additionally, the Fish ID plus function features three different categories in the Humminbird main menu.
You can activate the Fish ID Plus system from the main sonar menu and set the FISH ID plus settings. Besides that, there is also a fish ID alarm that you can change or re-set from the Alarms menu.
Moreover, it is best to take some time off your hands for more details and read Humminbird Fishfinder’s user manual to get a more unobstructed view.
Closing Statement
You can’t deny the benefits of having a Humminbird fishfinder. It will change your fishing experience to a beautiful extent.
We hope all your queries on using a Humminbird fish finder are now gone.


